Disassembling an air hockey table may be necessary for various reasons, such as moving to a new location or storing the table temporarily.
While the specific steps may vary depending on the model and design of the table, there are general guidelines to follow.
Properly disassembling an air hockey table requires careful attention to detail and a systematic approach to remove all components safely.
This guide will explore disassembling an air hockey table, providing helpful tips and step-by-step instructions to help you efficiently dismantle the table and prepare it for transportation or storage.
Understanding the proper techniques for disassembly will ensure that your air hockey table remains in excellent condition and can be easily reassembled when needed.
Make sure to turn off the power source before starting the disassembly process
Before embarking on the disassembly process of an air hockey table, it is crucial to prioritize safety by ensuring that the power source is turned off.
This step is essential to protect yourself and prevent any potential electrical hazards.
Locate the power switch or cord connected to the table’s blower system and make sure it is in the off position.
Disconnecting the power source eliminates the risk of accidental activation of the blower or other electrical components during the disassembly, reducing the chances of injury or damage.
Switching off the power source demonstrates a responsible approach and ensures a smooth and secure disassembly process.
Safety should always be the foremost consideration when working with any electrical equipment. Turning off the power source is a vital initial step to guarantee a safe disassembly of an air hockey table.
Gather the necessary tools to disassemble the air hockey table
Before beginning the disassembly process of an air hockey table, gathering the necessary tools is essential to ensure smooth and efficient dismantling.
The tools required may vary depending on the table’s make and model, but a few standard tools are often needed.
A set of screwdrivers, both flathead, and Phillips, is typically essential for removing screws and fasteners.
An adjustable wrench or pliers may also be necessary for loosening bolts or nuts. Depending on the table’s construction, a socket set or Allen wrenches might also be required.
Work gloves are advisable to protect your hands and ensure a better grip while disassembling the table.
By collecting these tools beforehand, you’ll be well-prepared to tackle the disassembly process efficiently and effectively, reducing the risk of potential damage or frustration.
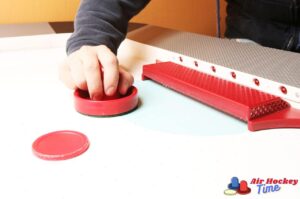
Unscrew all of the bolts to remove the legs of the air hockey table
To remove the legs of an air hockey table, identify the bolts that secure the legs to the table’s frame.
Typically, there will be multiple bolts on each leg.
Using an appropriate screwdriver or wrench, begin unscrewing the bolts individually.
Hold the leg steady as you loosen the bolts to prevent imbalance or shifting.
Once all the bolts have been removed, carefully detach the legs from the table’s frame.
Place the bolts in a secure location or keep them together in a bag to prevent them from getting lost.
Removing the legs will make the table more compact and easier to transport or store.
Ensure the table is stable and well-supported after removing the legs to prevent accidental tipping or damage.
Carefully lift off the tabletop to access the internal components
To access the internal components of an air hockey table, you’ll need to lift off the tabletop carefully.
Before proceeding, ensure that the table is stable and that any loose items or accessories are removed from the surface.
With a firm grip on the tabletop’s edges, lift it straight up, keeping it level to avoid any unnecessary strain or damage.
It’s essential to exercise caution and be mindful of the weight and dimensions of the tabletop.
If the table is particularly large or heavy, it may be helpful to have an extra set of hands to assist you.
Once the tabletop is lifted off, you can access the internal mechanisms, such as the blower system and wiring.
Remember to handle the tabletop carefully to avoid scratches or dents, as it must be reattached later.
By following this step, you can effectively access and work on the internal components of your air hockey table.
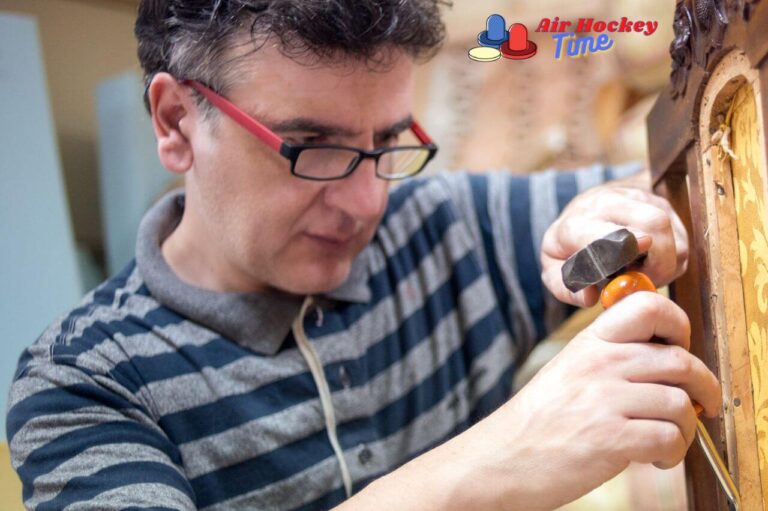
Unscrew and remove any additional parts inside, such as boards or blowers
After removing the tabletop of an air hockey table, it may be necessary to unscrew and remove additional parts inside, such as boards or blowers.
Carefully inspect the interior to identify any components that need to be detached.
I am using the appropriate screwdriver or wrench, unscrewing the fasteners, and securing these parts.
Please take note of the location and arrangement of each component as you remove them to ensure ease of reassembly later on.
Depending on the specific design of your table, there may be boards that need to be unscrewed or blowers that require disconnection.
Please exercise caution and patience during this process to prevent damage to the table or its internal components.
Keep the screws and other small parts organized and stored safely so that they can be easily retrieved.
By unscrewing and removing these additional parts, you’ll have complete access to the internal components of the air hockey table for maintenance, repairs, or storage purposes.
Set aside those pieces for later reassembly
As you disassemble an air hockey table, you must set aside the pieces you remove for later reassembly.
Each part you detach, whether the legs, boards, blowers, or other components, should be carefully stored safely and organized.
Please keep them in a designated area that won’t be misplaced or damaged.
Labeling or categorizing the parts is a good practice to ensure a more straightforward reassembly process.
By setting aside these pieces, you’ll save yourself from the hassle of searching for or replacing missing parts when it’s time to put the table back together.
Properly storing the disassembled pieces also helps protect them from any potential damage or loss during disassembly.
Being organized and mindful about the pieces you remove ensures a smoother and more efficient future reassembly of your air hockey table.
Frequently asked questions
Do legs come off the air hockey table?
Yes, the legs of an air hockey table are typically detachable, making it easier to move the table. Removing the legs allows for a more compact and manageable size during transportation or storage.
The exact method of detaching the legs may vary depending on the specific model of the table. Still, it generally involves unscrewing bolts or fasteners that secure the legs to the table’s frame. Once the legs are removed, the playing surface can also be detached if needed, further reducing the overall size of the table for convenience.
This modular design allows for greater flexibility when moving the air hockey table and ensures it can be easily reassembled.
Can you fix a warped air hockey table?
Fixing a warped air hockey table can be a challenging task, and the success of the repair depends on the severity of the warping and the construction of the table.
Sometimes, minor warping can be corrected by adjusting the table’s leveling feet to achieve a balanced playing surface.
However, if the warping is more significant or the table is made of low-quality materials, it may not be easy to fully restore the table to its original condition.
Professional repair services may offer specialized techniques to address warping, such as applying heat or pressure to reshape the playing surface.
However, these methods can be costly and may not always guarantee a perfect fix.
Prevention is often the best approach, so storing the table in a stable and controlled environment is essential to minimize the chances of warping.
Suppose you encounter a warped air hockey table. In that case, you should consult with experts or contact the manufacturer for guidance on the best action based on your situation.
In conclusion
Disassembling an air hockey table requires a systematic approach and attention to detail. Following the proper steps and guidelines, you can safely and efficiently dismantle the table for transportation, storage, or maintenance.
Start by turning off the power source to ensure safety and gather the necessary tools for disassembly.
Carefully remove the legs, unscrew additional components such as boards or blowers, and set aside all the pieces for later reassembly.
Throughout the process, handling the table and its components with care is essential to prevent damage.
Taking the time to disassemble the air hockey table properly ensures that it can be easily reassembled and preserves its condition for future use.
Following these steps, you can successfully disassemble an air hockey table and be ready for whatever comes next, whether moving, storing, or performing maintenance on the table.