Welcome to the ultimate guide on how to fix a hole in an air hockey table!
Air hockey is an exhilarating and fast-paced game loved by many, but occasionally, accidents happen, and a hole can appear on the playing surface.
Fear not, whether it’s a small chip or an enormous gash, as we’re here to walk you through how to mend that unsightly hole and restore your air hockey table to its former glory.
What materials are needed to repair an air hockey table hole?
You’ll require specific materials to repair an air hockey table hole successfully.
I am using clear epoxy to fill the dent until it reaches a level surface.
Once the epoxy has fully set, use sandpaper to carefully grind down the repaired area, ensuring a smooth finish.
Paying attention to any clogged air holes caused by the repair process is essential.
To resolve this, delicately re-drill the air holes to restore proper airflow and maintain the table’s gameplay integrity.
With these materials and precise steps, you can effectively mend the air hockey table hole, returning it to its original functionality and appearance.
What are the steps to prepare an air hockey table before repairing the holes?
Following a series of preparatory steps before repairing the holes in a hockey table ensures a successful and seamless repair process.
Firstly, thoroughly clean the entire surface of the table using a mild detergent or cleaner to remove any dust, dirt, or debris that might interfere with the repair.
Next, carefully inspect the table for loose or protruding fragments around the holes.
Use a gentle touch to remove or smoothen these areas, ensuring a clean and even surface for the repair.
Once the surface is clean and free of any obstructions, it’s advisable to mark the exact locations of the holes to focus the repair efforts accurately.
Finally, before applying any repair material, allow the table to dry completely to ensure optimal adhesion and longevity of the fix.
By diligently completing these preparation steps, you can set the stage for a successful and long-lasting repair of the air hockey table holes.
How do you Prepare the epoxy and apply it to the damaged area?
To prepare the epoxy and apply it to the damaged area on the air hockey table, follow these steps for a precise and effective repair.
Prepare the epoxy and apply it to the damaged area:
Firstly, carefully read and follow the instructions provided by the epoxy manufacturer.
This will ensure the correct mixing ratio and application process.
Next, mix the epoxy components thoroughly according to the manufacturer’s guidelines in a clean and well-ventilated area.
Use a disposable container and stir stick for this purpose.
Once the epoxy is adequately mixed, apply it to the damaged area using a putty knife or a similar tool.
Ensure the epoxy fills the hole and is level with the surrounding surface.
Take care not to apply excessive pressure to avoid displacing the epoxy.
Allow the epoxy to cure overnight.
After applying the epoxy, allow it to cure for the recommended time specified by the manufacturer.
The best thing you can do is allow the epoxy to cure correctly overnight.
This may seem like a long time, but trust me; it’s worth it.
By letting it cure for a whole night, you’ll ensure that it’s fully hardened and ready to withstand any stresses or wear and tear that it may face.
Plus, you’ll be able to wake up to a finished project that looks amazing!
So, please sit back, relax, and let that epoxy do its thing. Tomorrow, you’ll be glad you did.
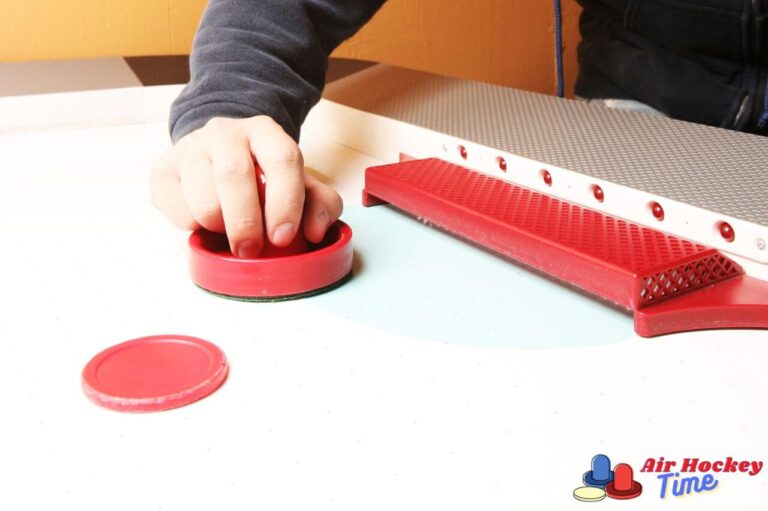
Use sandpaper to grind down the surface until it is level with that of the air hockey table
Once the epoxy has been set, use sandpaper to carefully grind down the repaired area to achieve a smooth finish.
Carefully re-drill any clogged air holes
if you notice any clogged air holes caused by the repair process, delicately re-drill them to restore proper airflow and maintain the table’s gameplay integrity.
Following these steps, you can effectively prepare and apply the epoxy, restoring the air hockey table to its optimal condition.
Frequently asked questions
Can you replace the top of an air hockey table?
Indeed, replacing the top of an air hockey table is possible, mainly if significant damage has occurred and repair is not feasible.
When the table sustains extensive damage beyond what simple repairs can fix, replacing the top becomes a viable solution.
By doing so, you can ensure that the table regains its functionality and appearance, providing a fresh playing surface for a seamless gaming experience.
Whether due to irreparable holes, deep scratches, or other forms of severe damage, opting for a replacement top allows you to extend the lifespan of the air hockey table, enabling continued enjoyment for players of all ages.
Can you wax the air hockey table?
Indeed, it is possible and beneficial to wax an air hockey table.
Applying wax to the surface of the table serves several essential purposes.
Firstly, it effectively smoothens any roughened or age-worn areas, enhancing the overall playing experience for enthusiasts.
Additionally, waxing the table contributes to its aesthetics, providing a refreshed and newer appearance.
Furthermore, the wax acts as a protective layer, safeguarding the table against potential future damage, such as scratches or wear caused by intense gameplay.
Regularly waxing the air hockey table maintains its pristine condition and ensures that players can consistently enjoy smooth and fast-paced matches.
In conclusion
Fixing a hole in an air hockey table requires a systematic and careful approach to ensure a successful repair.
You can effectively address the damage by gathering the necessary materials, such as clear epoxy, sandpaper, and a drill.
Preparing the table before starting the repair process is crucial, which involves cleaning the surface, inspecting for loose fragments, and marking the exact locations of the air holes.
Following the manufacturer’s instructions is essential when applying the epoxy, ensuring proper mixing and precise application to achieve a level surface.
Once the epoxy has cured, using sandpaper to grind down the repaired area will result in a smooth finish.
By diligently following these steps, you can restore the air hockey table to its original functionality, providing countless hours of enjoyable gameplay for years.